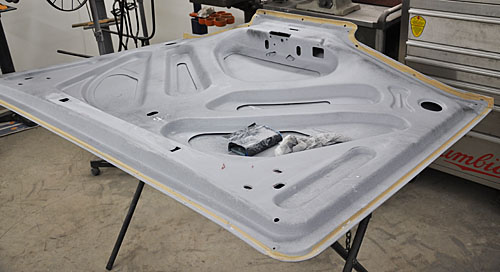
When the bottom of the trunk lid was stripped of its original paint, we used an 90º die grinder with some Roloc discs to do the job. This turned out to be a bad idea. I don’t even remember what grit we were using, but it was too much… basically it scarred up the metal to where a simple coat of Epoxy, then color wasn’t going to work. It was going to need some high-build primer, this means lots more work sanding that all out! Live and learn I guess. This primer, some Evercoat Featherfill has been on here for quite a while, with the lid being stored out of the way. Well I finally got around to starting on the sanding today. I want to get the bottom of this lid ready for paint ASAP, because I’m going to need to affix the factory style insulation into the cutouts before I do any bodywork to the top side. Reason being, this insulation is going to hold the panel out slightly in some areas. To do the bodywork on the outside without this insulation in place would mean all the blocking work would have to be redone later. The reproduction insulation pieces are sticky-back, so once I put them in… they are in for good, and I don’t want to have to mask them off… so I’m going to it first.

All of that yellow stuff around the edge is seam sealer, just like it had from the factory. The above picture shows the lid with guide-coat over the primer to show where I’ve already sanded, and where I need to sand more to get out the imperfections.
